Docs / Connectors / Google Cloud Pub/Sub
Google Cloud Pub/Sub Connector
The ASAPIO Integration Add-on connects SAP S/4HANA and SAP ECC directly to Google Cloud Pub/Sub, publishing business events in real time using JWT-authenticated REST calls. The connector uses a Google Cloud service account key (P12) stored in the SAP SSF application layer for secure, non-interactive authentication.
Overview
| Component | Type |
|---|---|
| ASAPIO Integration Add-on – Framework | Base component (required) |
| ASAPIO Integration Add-on – Connector for Google Cloud Pub/Sub | Additional package |
| Property | Value |
|---|---|
| Cloud Type | GOOGLE_PS |
| ACI Handler Class | /ASADEV/CL_ACI_GPUBSUB_HANDLER |
Prerequisites
A Google Cloud project with Pub/Sub enabled and a service account with at least the Pub/Sub Publisher role (or a custom role granting pubsub.topics.publish). The SAP application server must have HTTPS connectivity to pubsub.googleapis.com and oauth2.googleapis.com.
Google Cloud Authorization Setup
The connector authenticates using a Google Cloud service account JWT. The service account requires the IAP-secured Web App User role.
Create Service Account and P12 Key
- In Google Cloud Console, navigate to IAM & Admin → Service Accounts.
- Create a new service account and assign the required roles.
- Go to the service account's Keys tab, click Actions → Manage keys, then Add Key → Create new key.
- Select P12 format and download the key file. Note the key password (default:
notasecret).
SSL Certificate (STRUST)
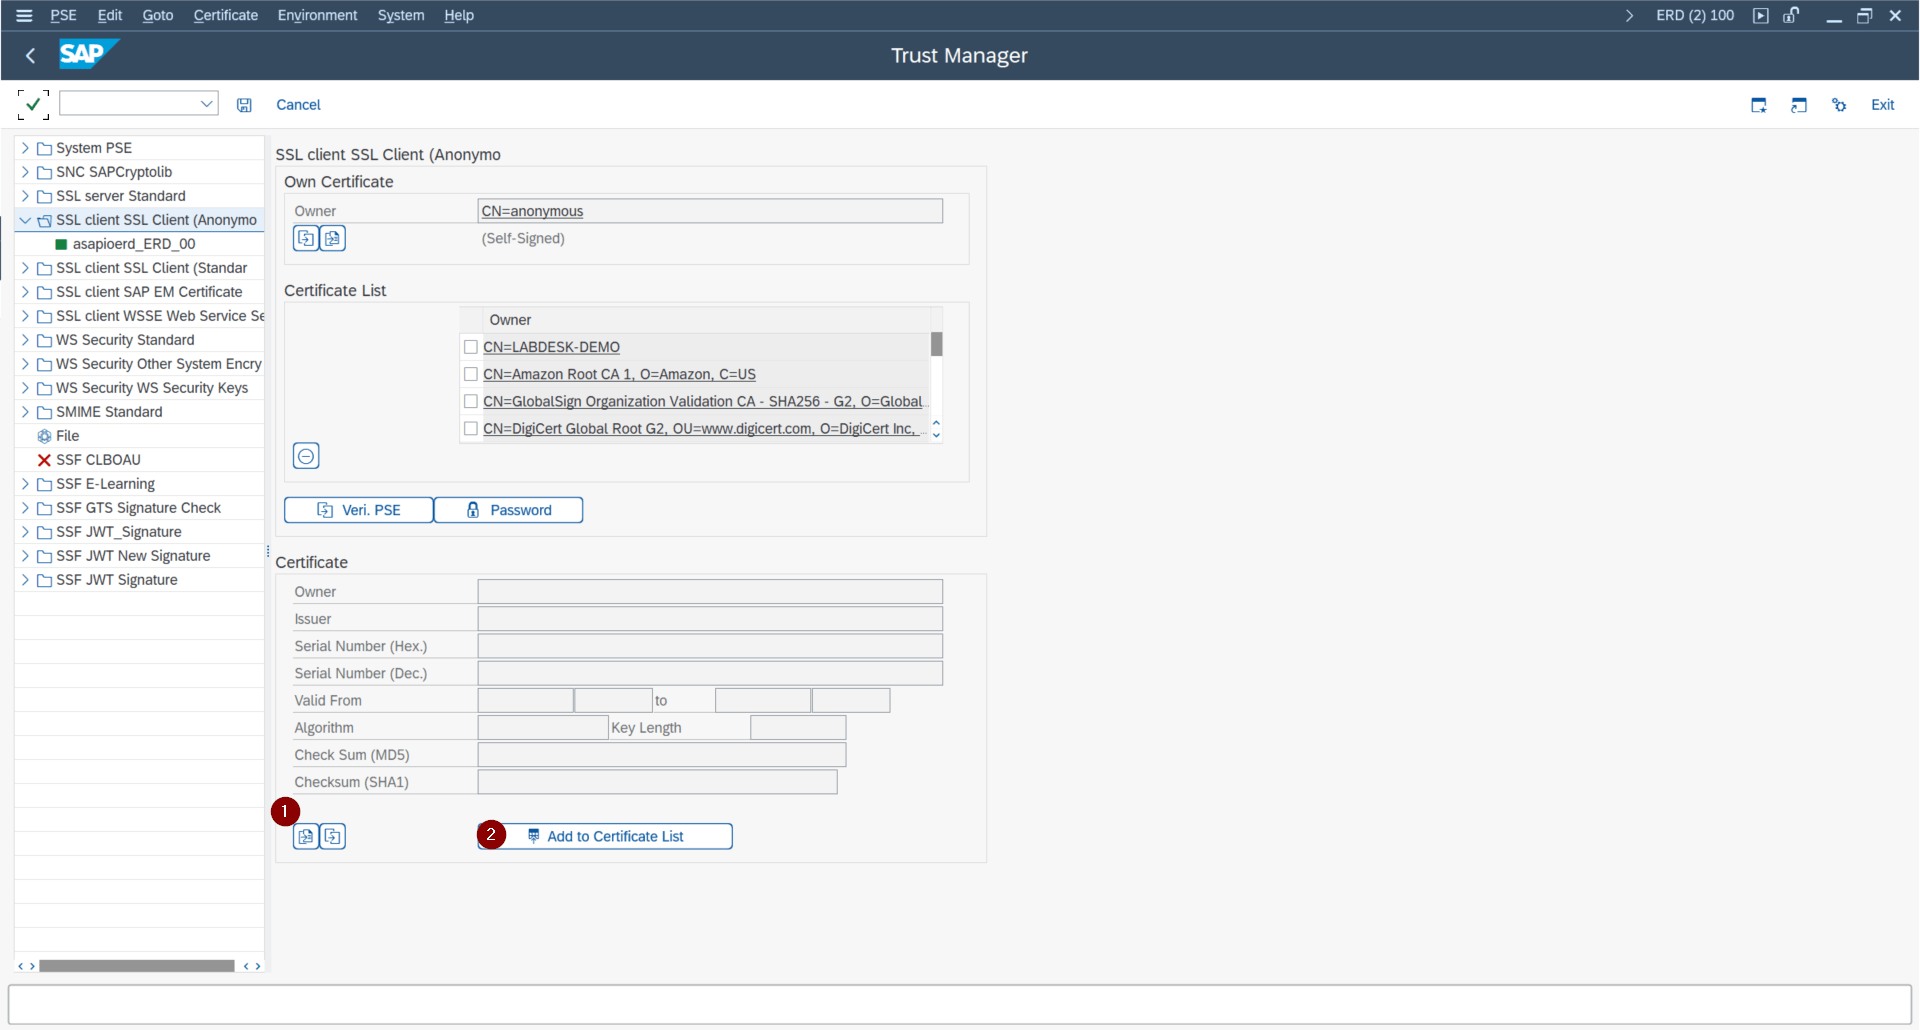
Google services use certificates issued by GlobalSign. Download the GlobalSign root CA certificate from support.globalsign.com and import it into the SAP SSL trust store.
In transaction STRUST:
- Select SSL Client (Anonymous).
- Click Import Certificate and select the downloaded GlobalSign certificate.
- Click Add to Certificate List and save.
SSF Application Setup
The P12 service account key must be registered as an SSF application in SAP so the connector can use it for JWT signing.
Modern SAP Systems (transaction SSFA)
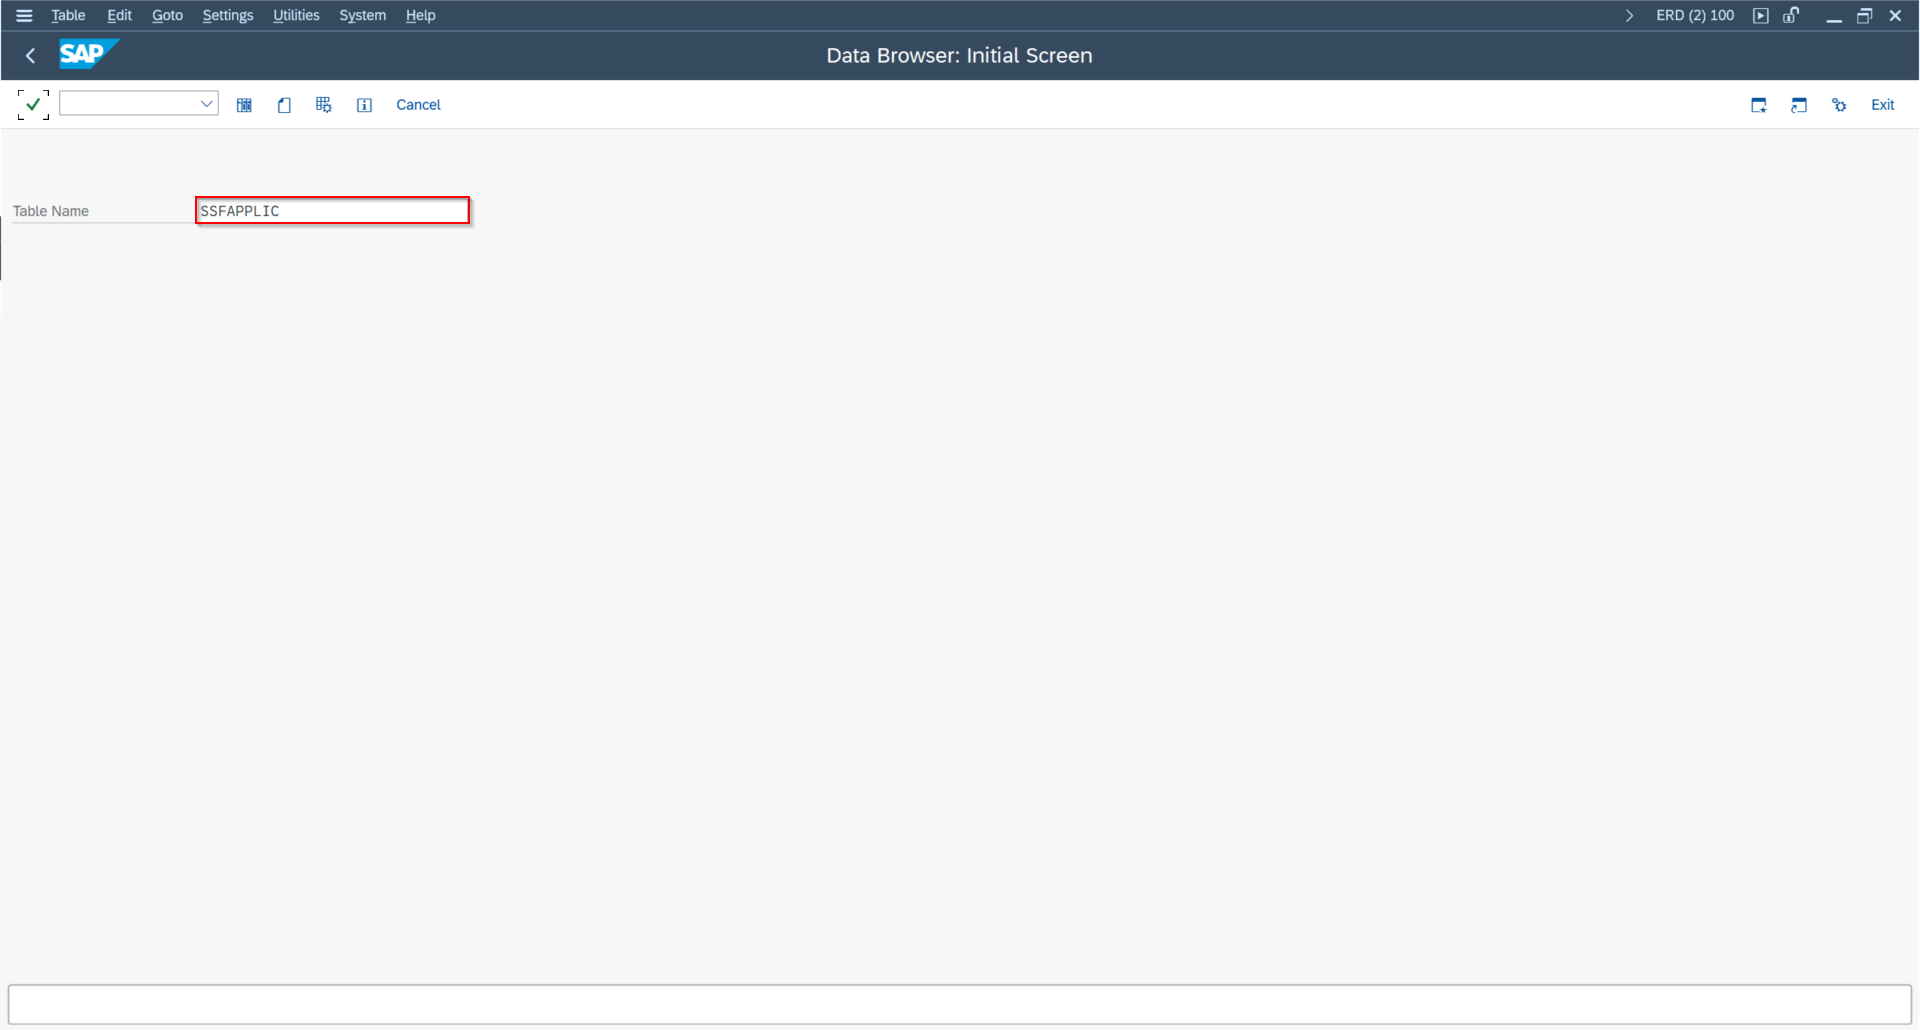
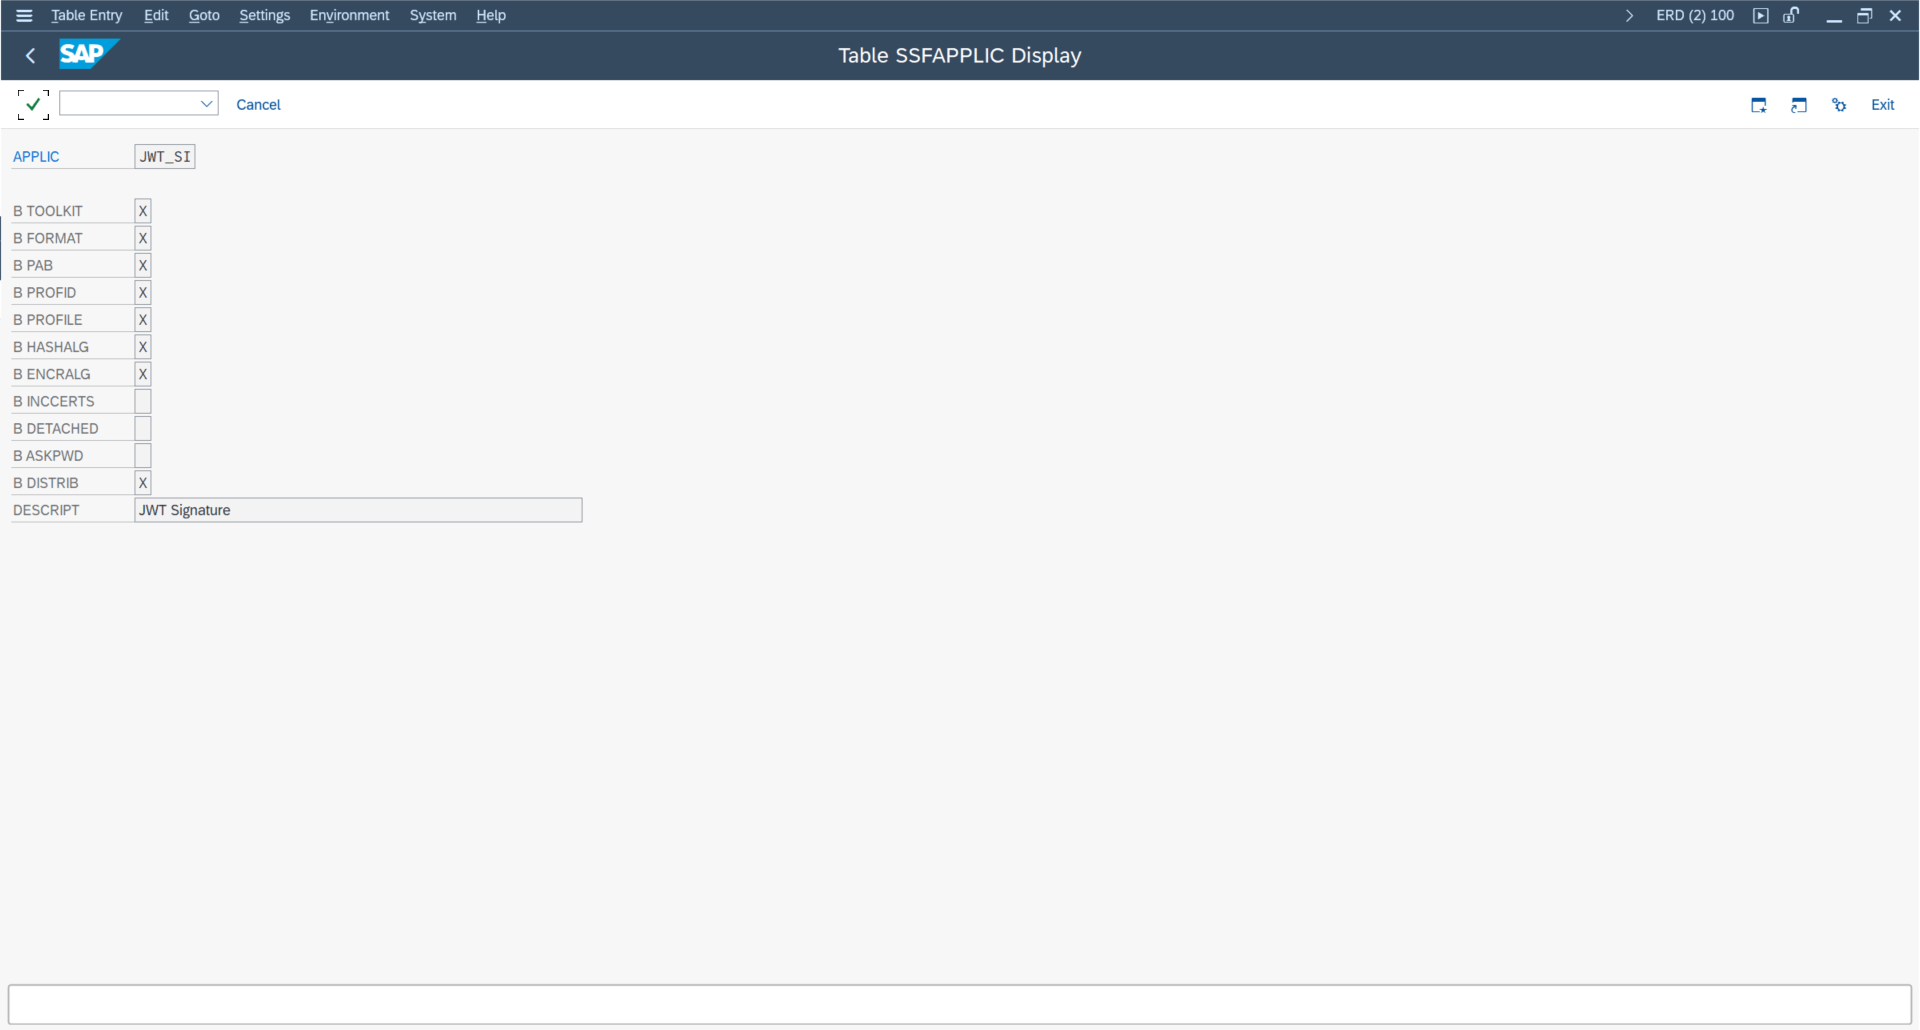
- Open transaction SSFA (or SE16 table
SSFAPPLICto locate the correct application entry). - Select the SSF application entry for the Google connector.
- Choose PSE → Import and import the
.p12key file using the P12 key password. - Choose PSE → Save as SSF Application to register it.
Older SAP Systems
On older SAP systems where SSFA is not available, import using sapgenpse:
sapgenpse import_p12 -p <drive>:usr<SSF_Profile> <key>.p12SAP Connection Setup (in SAP Gui)
The connection setup in SAP GUI is a required first step for all configuration paths. This creates the RFC destinations, activates the cloud adapter, and registers the connection instance that both Event Studio and SAP GUI-based event configuration rely on.
Step 1 — Create RFC Destinations (SM59)
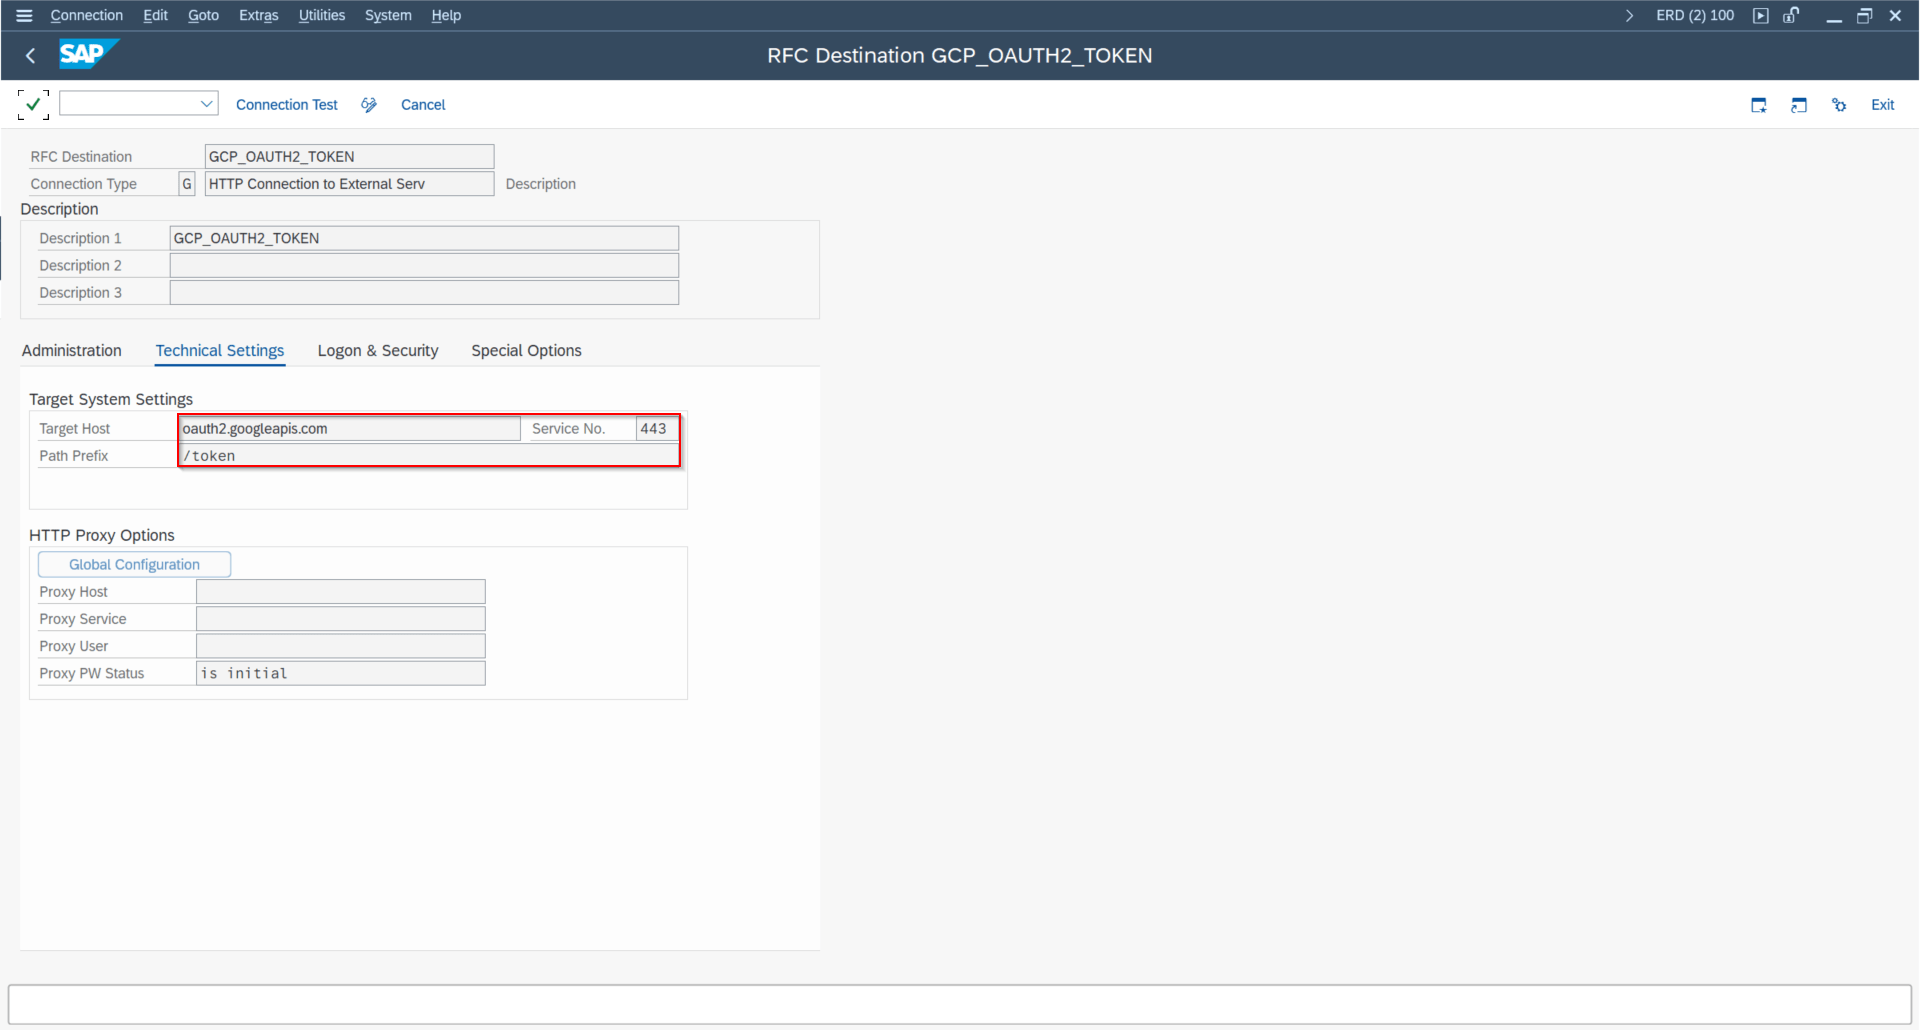
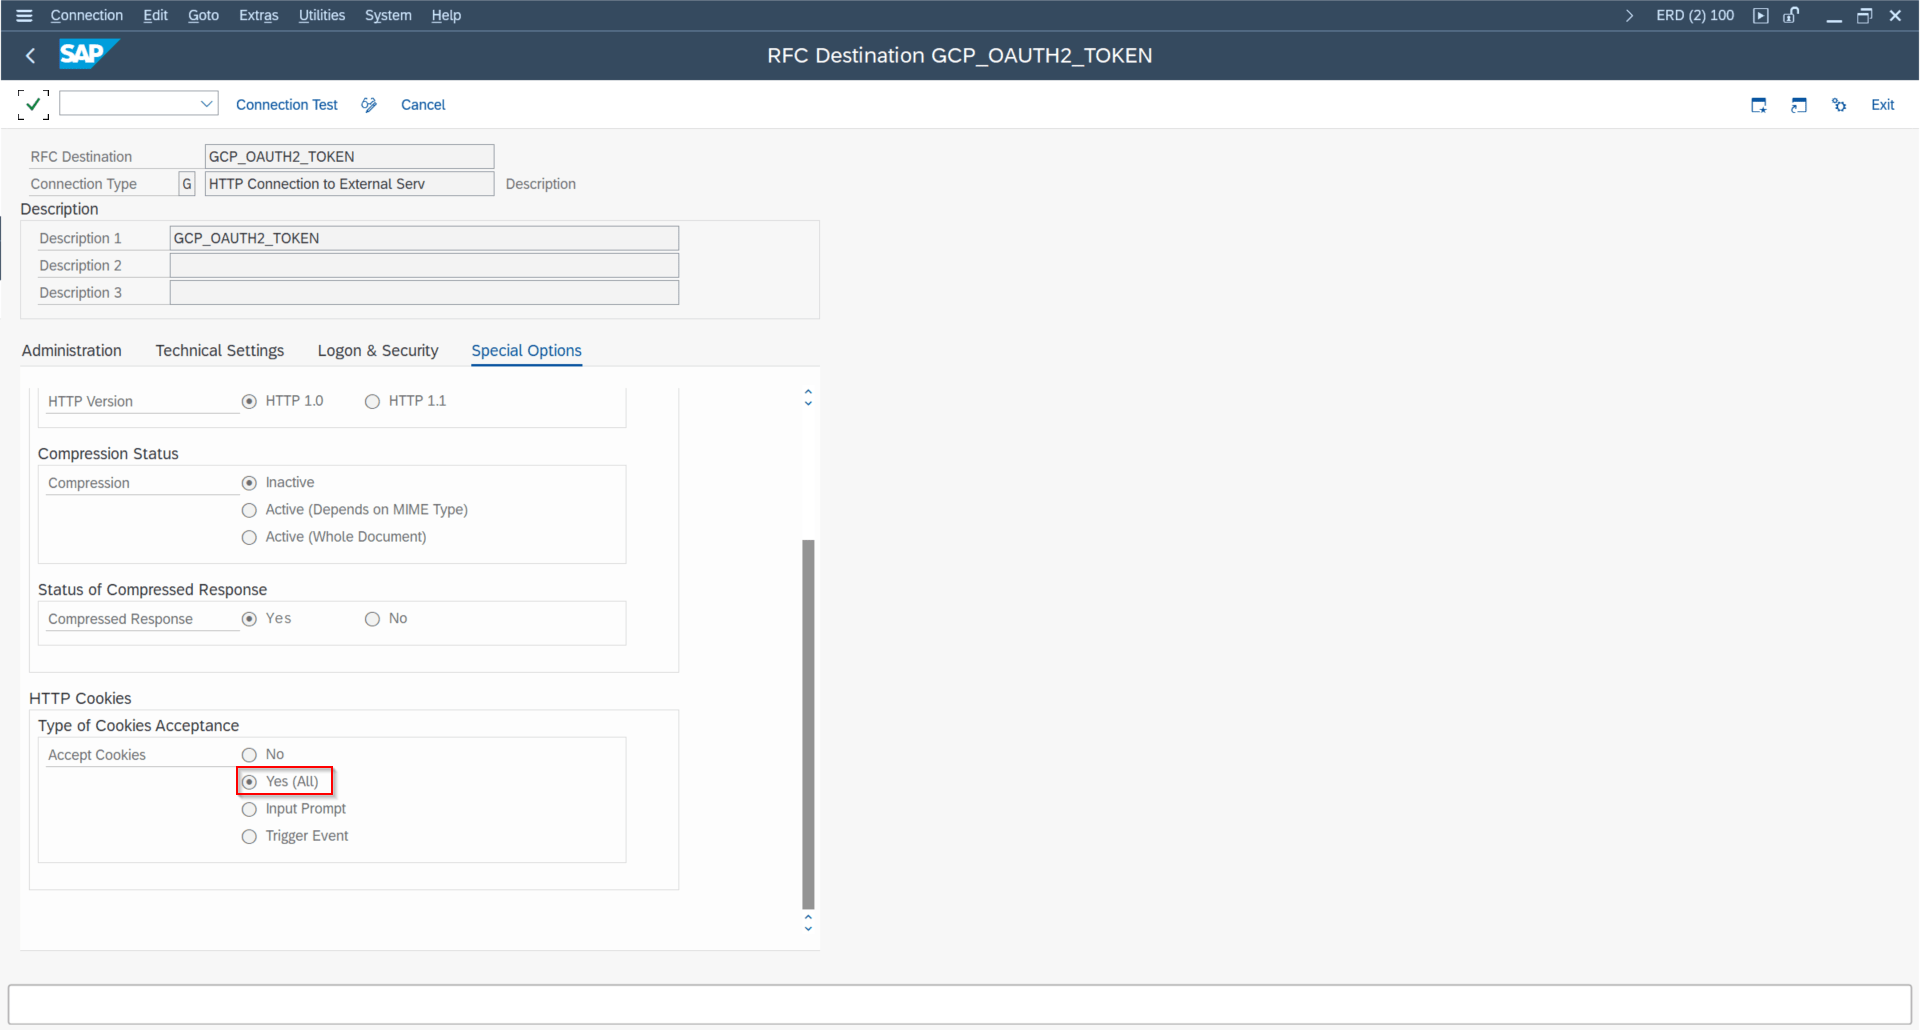
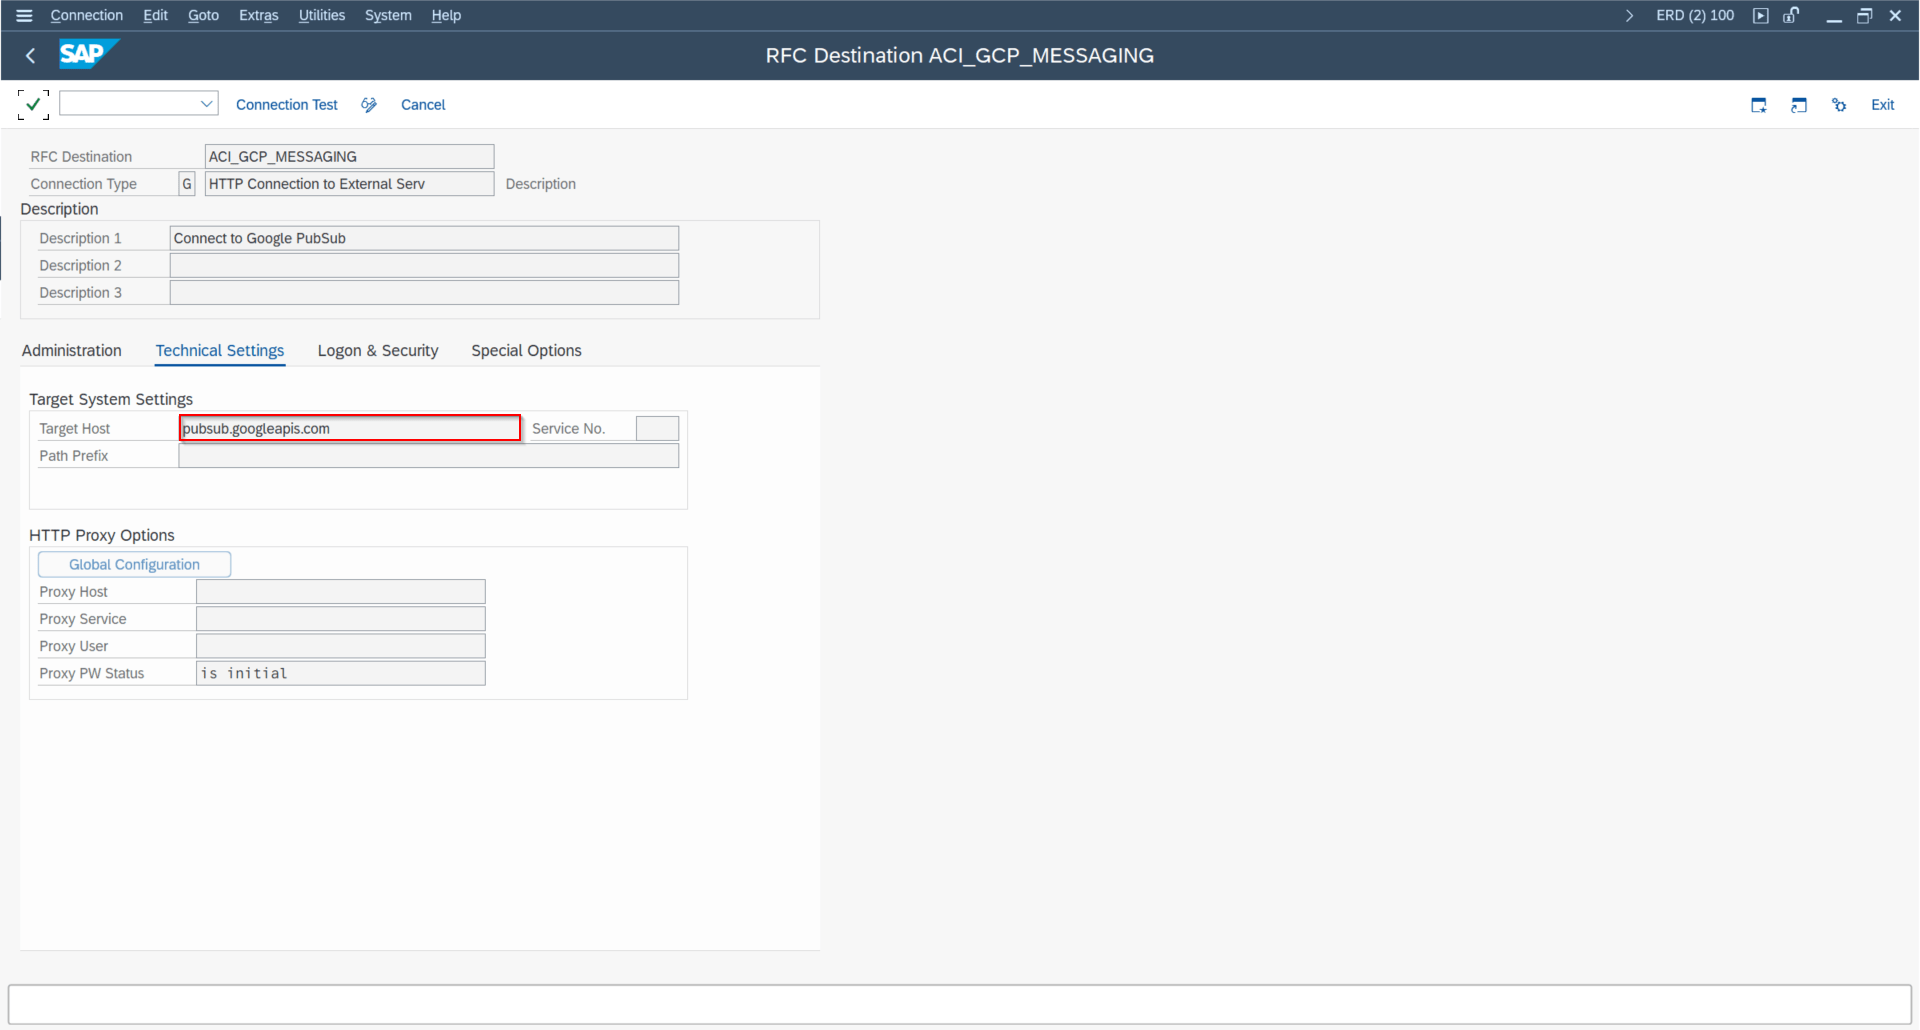
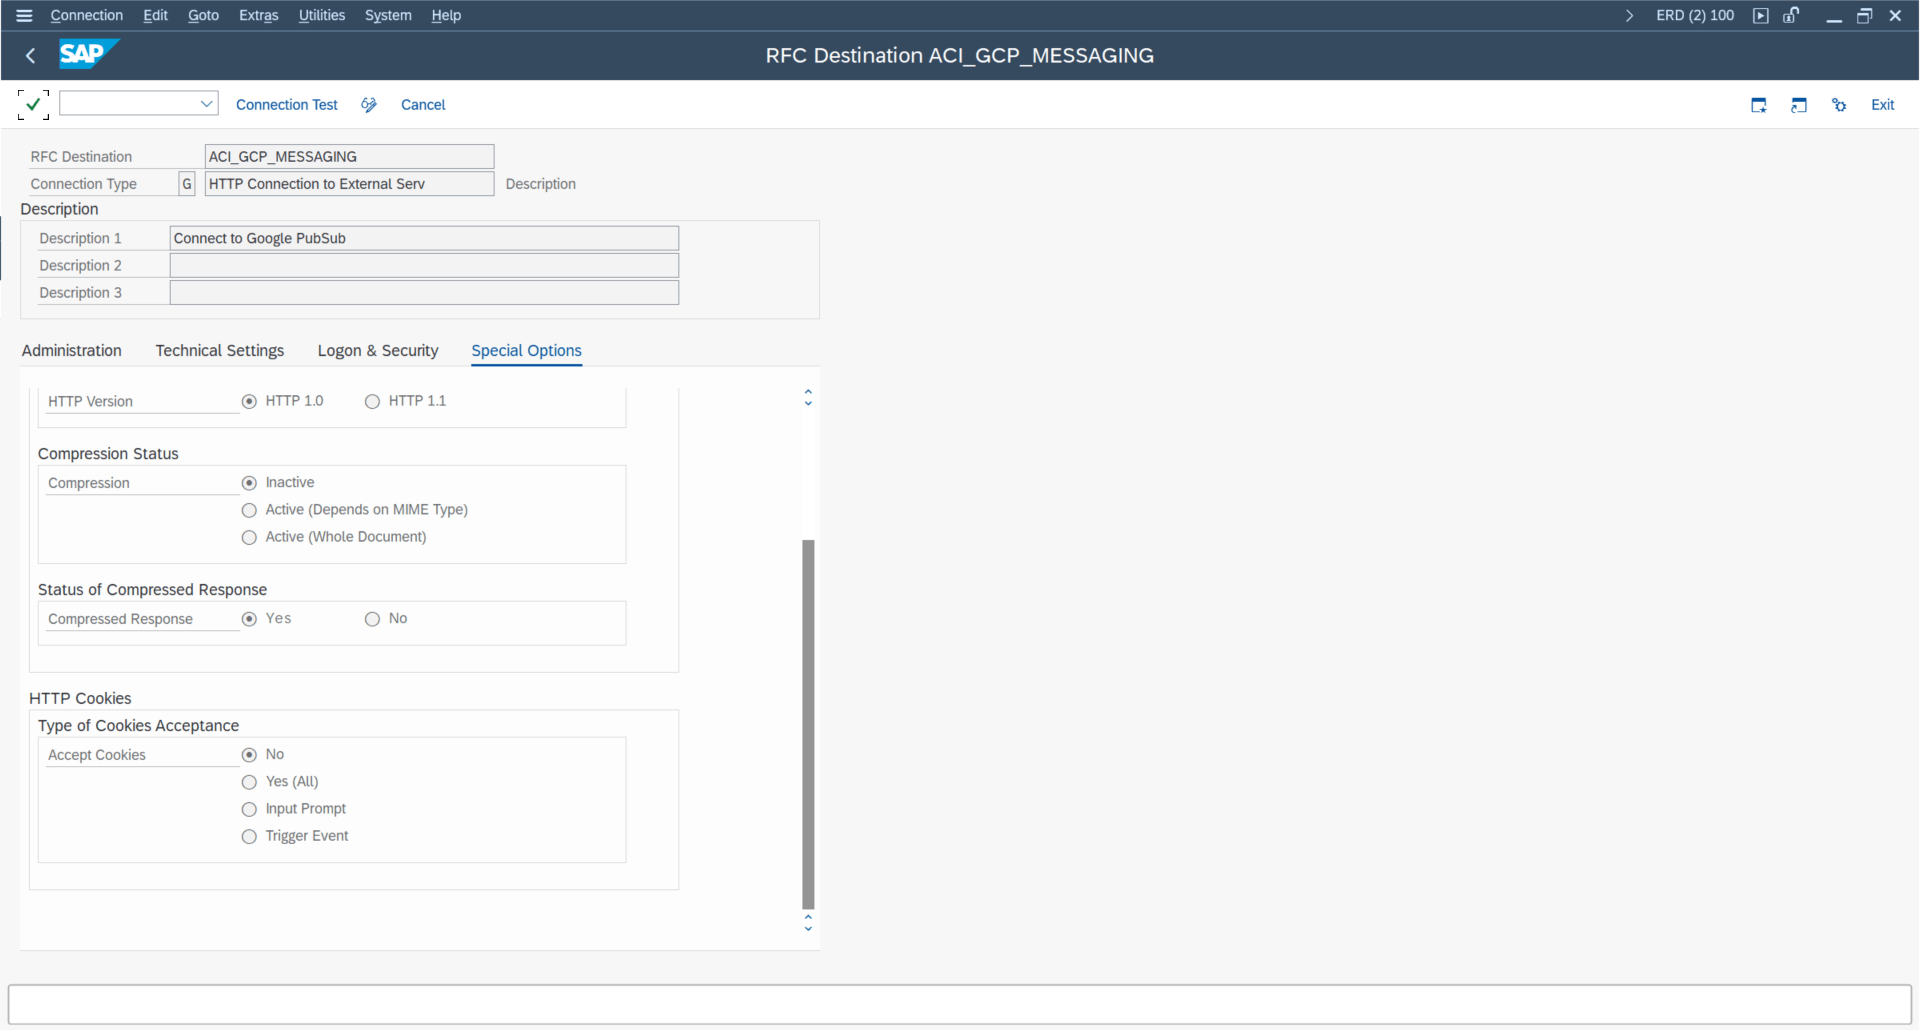
Create two HTTP type G RFC destinations:
- OAuth token endpoint: host
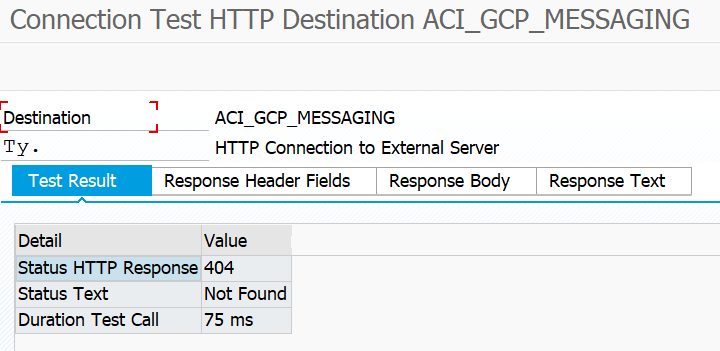
oauth2.googleapis.com. Note: HTTP 404 on connection test is expected and not an error. - Pub/Sub endpoint: host
pubsub.googleapis.com. Note: HTTP 404 on connection test is expected. An SSL error indicates a misconfiguration in STRUST.
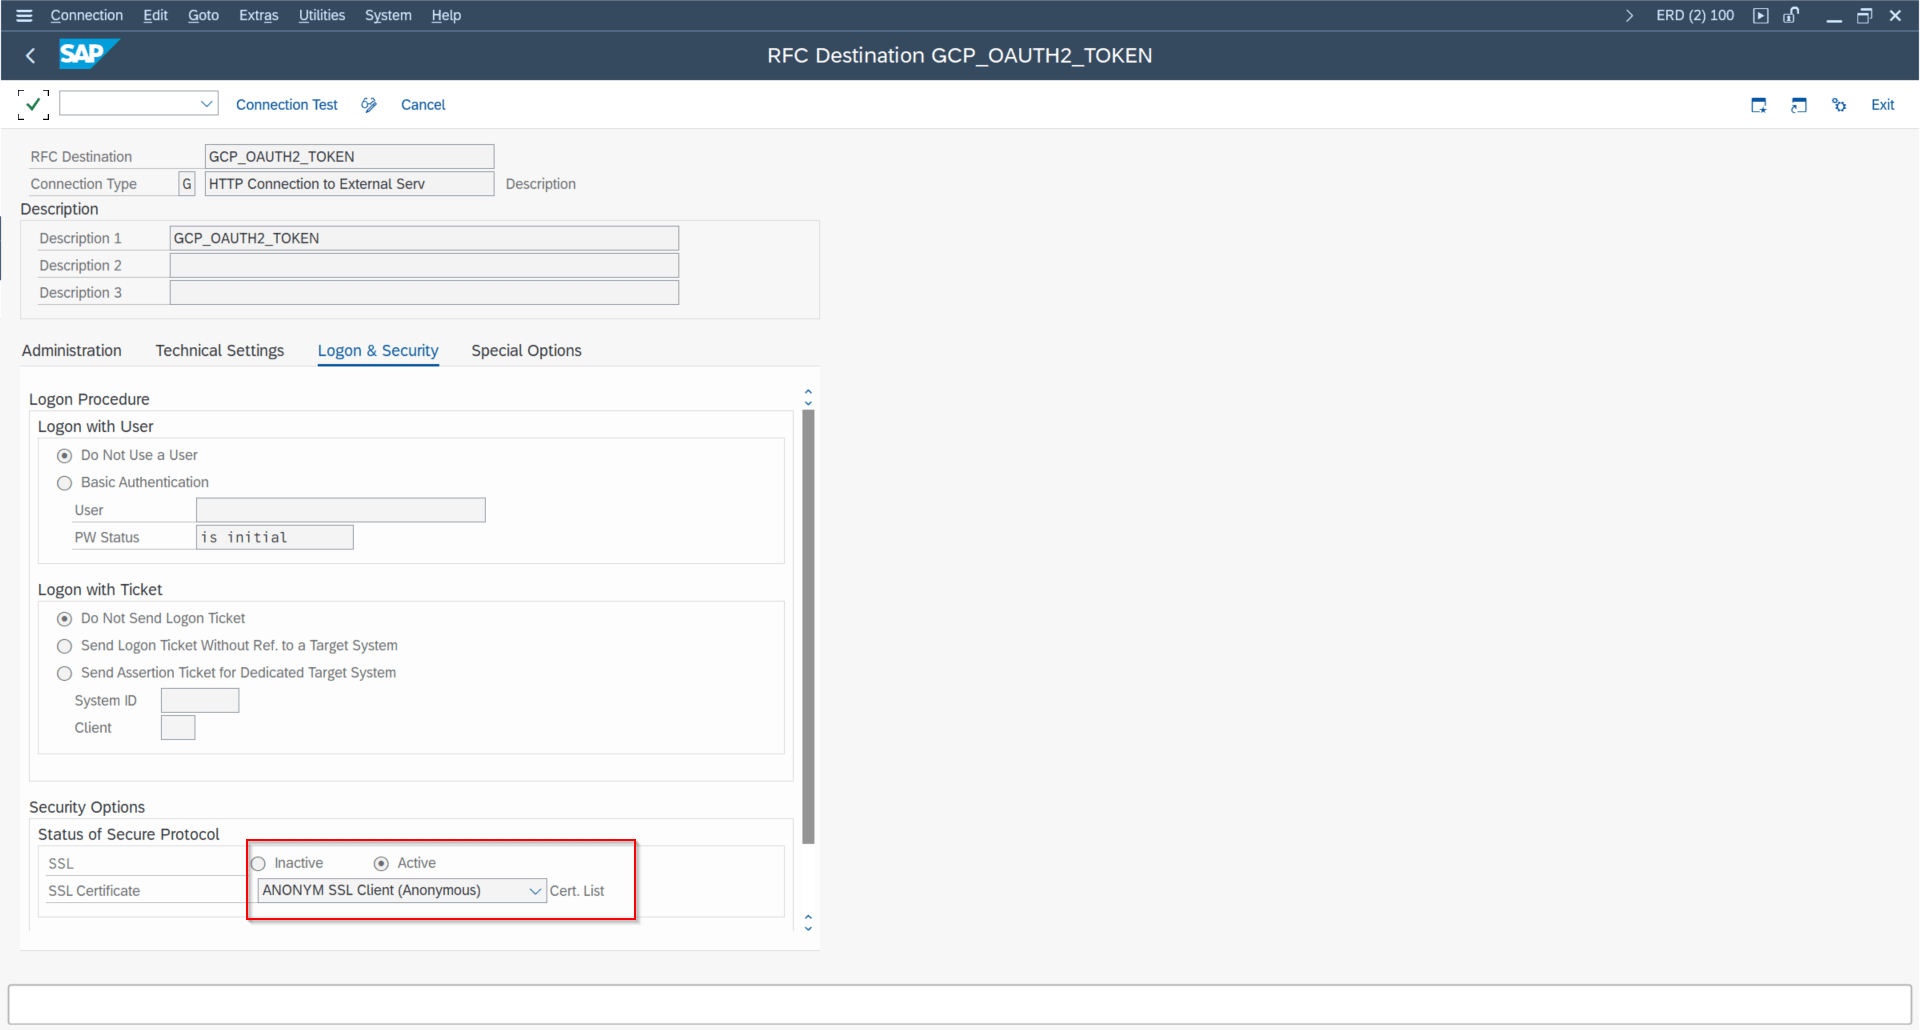
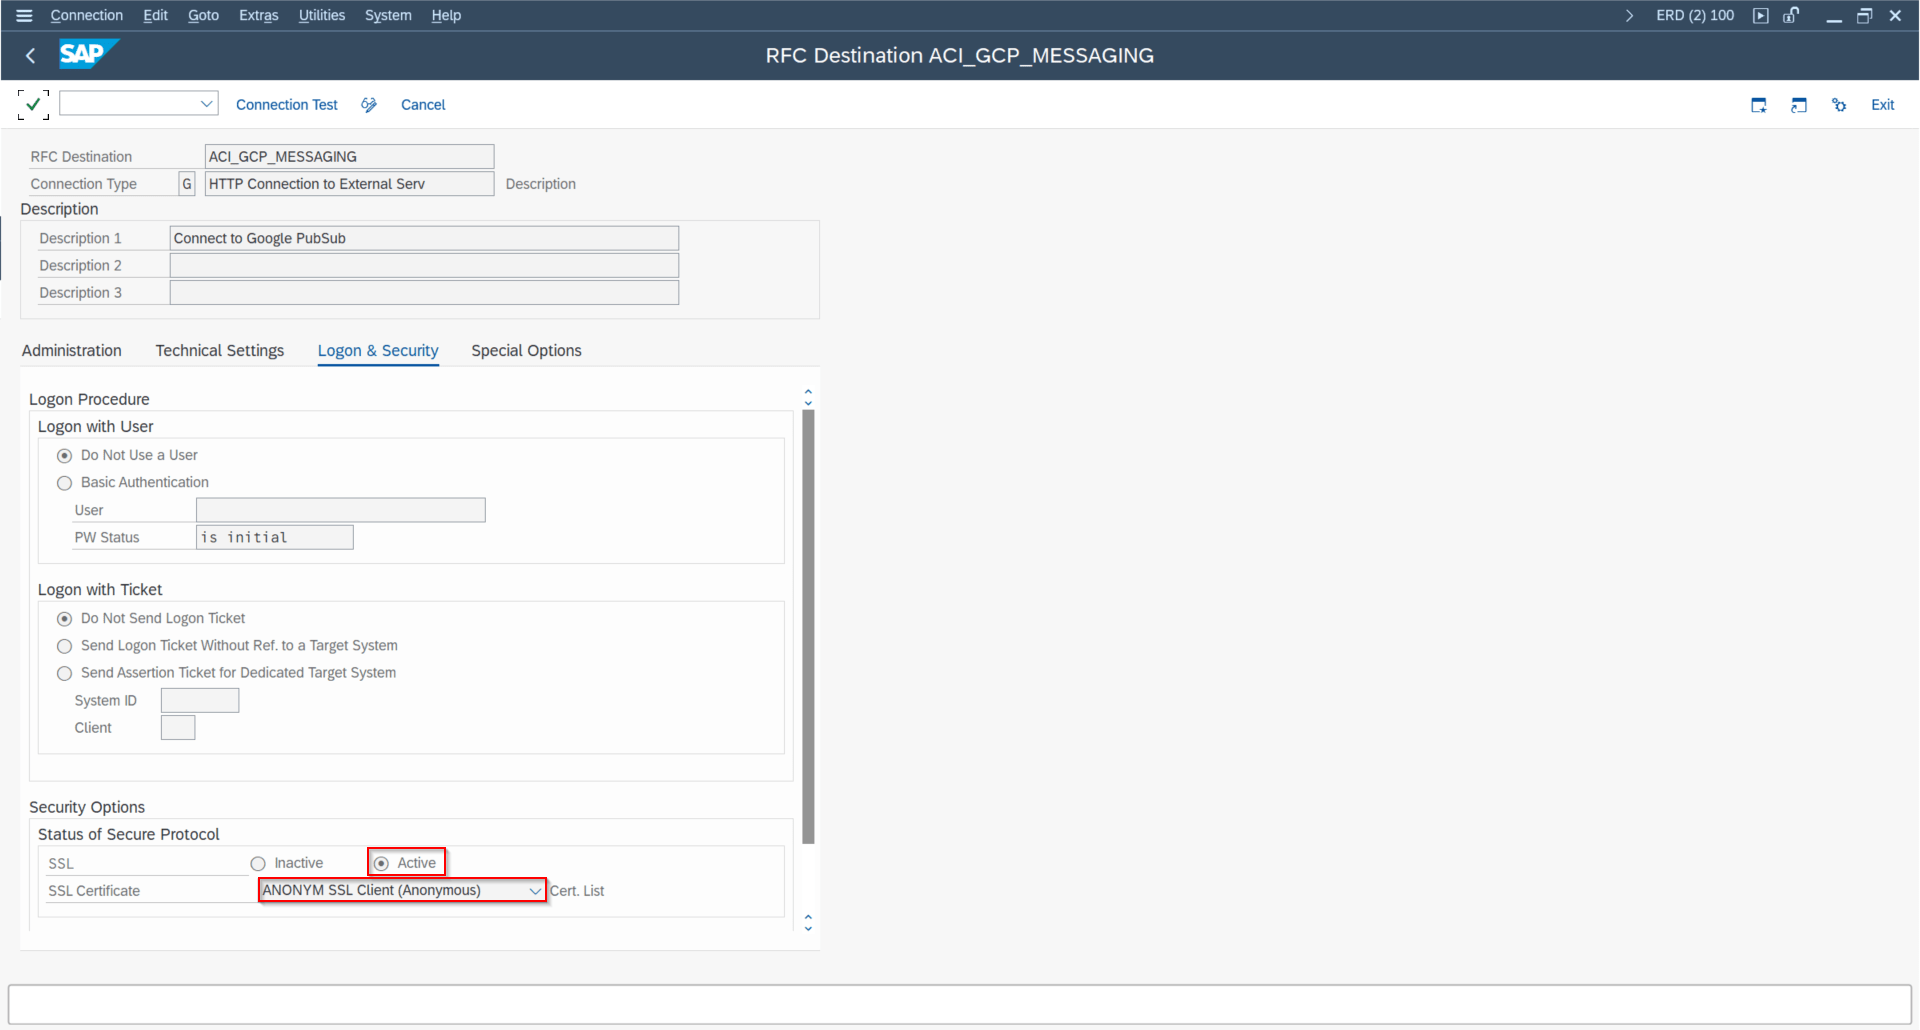
Enable SSL on both RFC destinations using the certificate list where the GlobalSign cert was imported.
Step 2 — Configure Cloud Adapter (SPRO)
In SPRO → ASAPIO Cloud Integrator → Maintain Cloud Adapter, set:
- Cloud Type:
GOOGLE_PS - ACI Handler Class:
/ASADEV/CL_ACI_GPUBSUB_HANDLER
Step 3 — Create Connection Instance
In transaction /ASADEV/ACI_SETTINGS, create a connection instance and set the following mandatory default values:
| Default Attribute | Value / Description | Required |
|---|---|---|
GCP_EMAIL_SERVICEACCT_JWT_ISS | Service account email address (the JWT issuer) | Yes |
GCP_TOKEN_DESTINATION | RFC destination name for the OAuth token endpoint (oauth2.googleapis.com) | Yes |
GCP_SSF_PROFILE | SSF application name where the P12 key was imported | Yes |
GCP_EXPIRATION_TIME_JWT_EXP | JWT expiry time in seconds (max: 3600) | Optional |
GCP_PERMISSION_JWT_SCOPE | OAuth permission scope for the JWT (e.g., https://www.googleapis.com/auth/pubsub) | Optional |
Create an outbound interface (Event Studio)
Prerequisite: The connection instance must already be set up in SAP GUI (see SAP Connection Setup above) before Event Studio can be used to configure events.
Event Studio is the recommended web-based interface for creating and managing events. To configure a Google Pub/Sub event:
- Open Event Studio and select the backend SAP system.
- Go to the Data Catalog to find the data object to stream.
- In the Available Standard Events table, click Deploy, or use Create to define a new event.
- Select the Google Pub/Sub connection from the Connection dropdown — the Header Fields table auto-populates with the connection's default attributes including
GCP_EMAIL_SERVICEACCT_JWT_ISS,GCP_TOKEN_DESTINATION, andGCP_SSF_PROFILE. - Set
GOOGLE_TOPICto the full Pub/Sub topic path. - Save and activate the event.
After creating the interface in Event Studio, see Header Attributes for message configuration and Custom Message Attributes for advanced metadata.
Header Attributes
Configure the following header attribute on the outbound object. Header attributes apply equally when configuring via Event Studio or SAP GUI.
| Header Attribute | Value / Description | Required |
|---|---|---|
GOOGLE_TOPIC | Full Pub/Sub topic path: projects/<PROJECT_ID>/topics/<TOPIC_NAME> | Yes |

Create an outbound interface (SAP Gui)
| Method | Extraction FM | Formatting FM |
|---|---|---|
| Simple Notify | /ASADEV/ACI_SIMPLE_NOTIFY | /ASADEV/ACI_EVNT_FORMATTER_GCP |
| Message Builder | /ASADEV/ACI_GEN_VIEW_EXTRACTOR | /ASADEV/ACI_GEN_VIEWFORM_GCP |
| Packed Load | /ASADEV/ACI_GEN_VIEW_EXT_PACK | /ASADEV/ACI_GEN_VIEWFORM_GCP |
Create Outbound Object
In transaction /ASADEV/68000202, select the connection instance and add an entry under Outbound Objects. Set the method, message type, and Formatting FM as shown above. Set GOOGLE_TOPIC under the Header Attributes tab.

Event Linkage (SWE2)
Register the event trigger in transaction SWE2:
- Receiver Function Module:
/ASADEV/ACI_EVENTS_TRIGGER - Tick Type linkage Activated
Packed Load — Header Attributes
| Attribute | Description | Example |
|---|---|---|
ACI_PACK_TABLE | Table for key fields | MARA |
ACI_PACK_SIZE | Records per delivery package | 500 |
ACI_PACK_KEY_LENGTH | Total length of key fields | 13 |
ACI_PACK_WHERE_COND | Optional WHERE condition on ACI_PACK_TABLE | — |
ACI_PACK_RETRY_TIME | Seconds before retrying server group resource acquisition | 300 |
ACI_PACK_BDCP_COMMIT | Generate change pointers per entry (~50% performance impact) | X |
Custom Message Attributes
Available from release 9.32507. Google Pub/Sub supports up to 100 custom message attributes per message. These key-value pairs are visible on every message and can be used by Pub/Sub subscription filters.
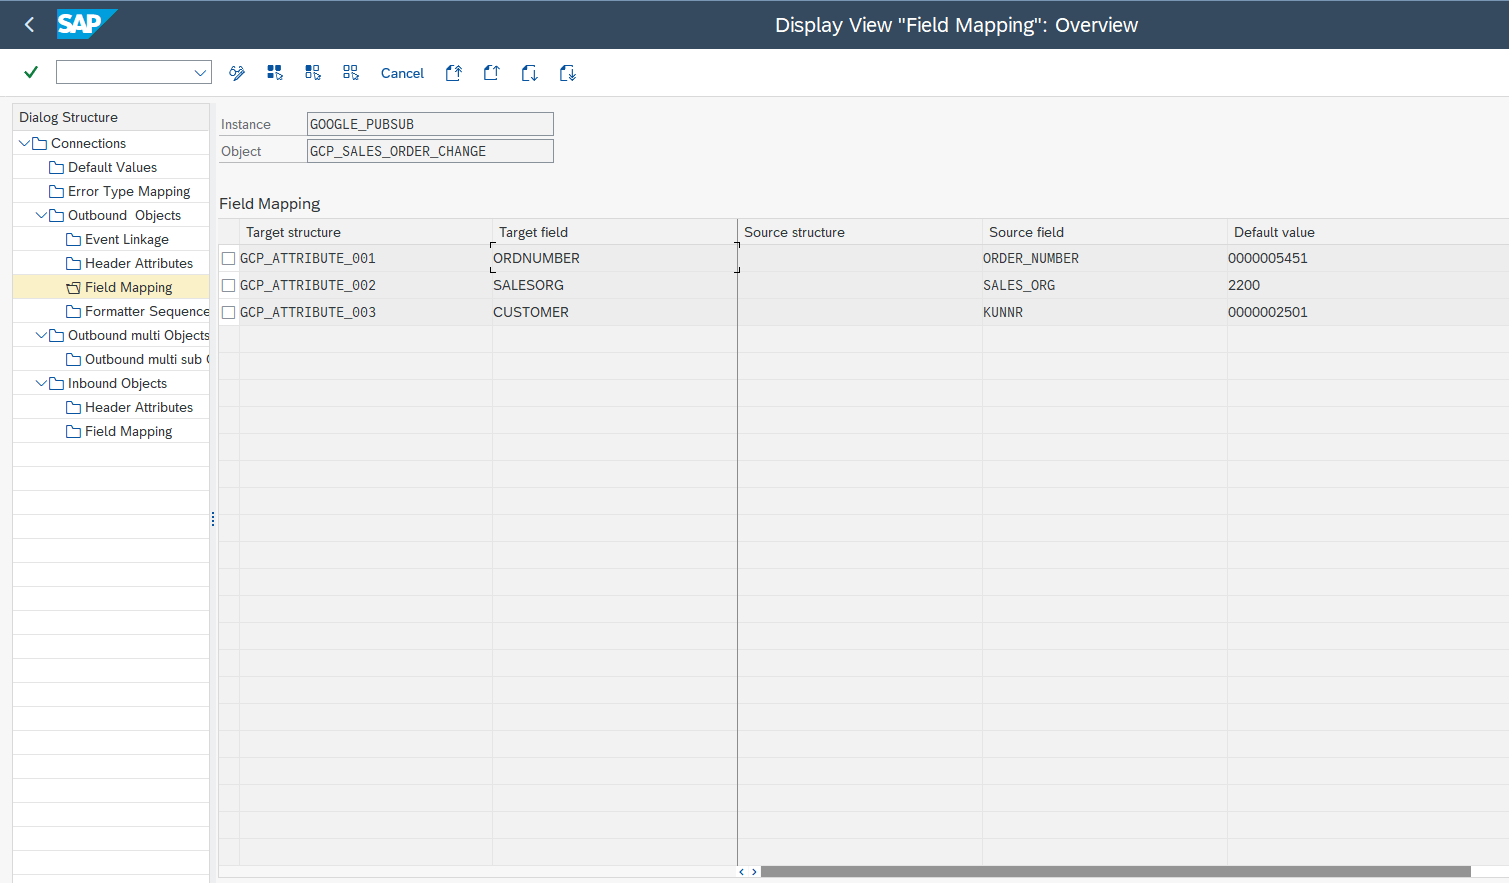
Configuration (Field Mapping Section)
In the Field Mapping section of the outbound object, add entries with:
- Source structure / field: the SAP field providing the value
- Target field: the Pub/Sub attribute name
- Default value: optional static fallback
A conversion class/method can be specified to transform raw field values. The resulting attribute values are visible in the ASAPIO monitor when tracing is activated.